Announcement

Collapse
No announcement yet.

Napsgear: The Top 6 Trap Bar Exercises That Aren’t Shrugs or Deadlifts

Collapse
X
 
  • Filter
  • Time
  • Show
Clear All
new posts

  • Napsgear: The Top 6 Trap Bar Exercises That Aren’t Shrugs or Deadlifts


    This versatile workout tool can be used for a lot more than just pulls.

    Al Gerard created the trap bar in the late 1980s as a simpler way to perform shrugs, which is how the trap bar earned its name. And who doesn't enjoy working out their upper back biceps and traps? A large set of traps is like the cherry on top of a well-built body, but incorporating trap bar training into your regimen may lead to so much more.

    This post will go over the advantages of using a trap bar as well as six fantastic exercises that don't use deadlifts or shrugs.

    DESIGN OF THE TRAP BAR
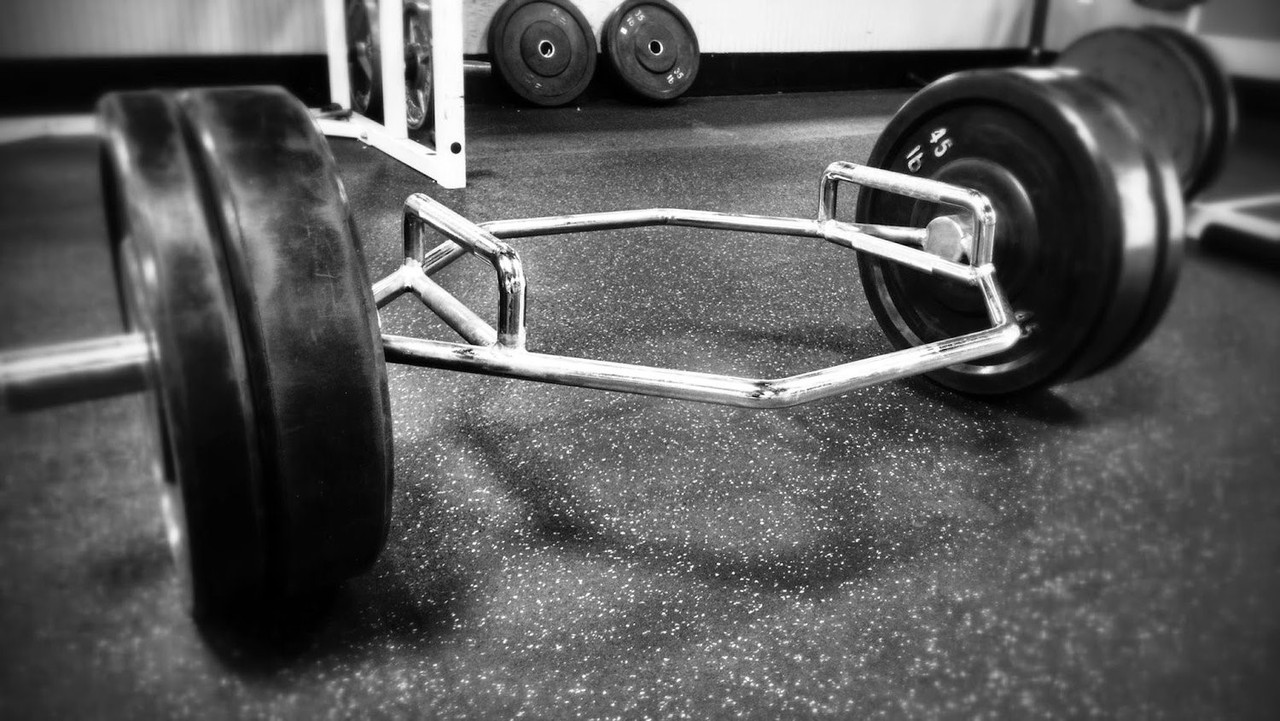
    Trap bars typically have two pairs of handles: one set of D handles, which extend upward in the shape of a squared D from the bar, and the other pair, which is flush with the bar. And either pair is accessible by flipping the bar over. The range of motion required to pick it up off the ground is shorter with the D handles and longer with the level ones. The weight-bearing stubs on either side are angled at a right angle to the handles.

    You can step within the bar thanks to the hex design of the trap bar and the stubs, which brings the weight closer to your center of gravity. For lifters who have a history of low back problems or who want to reduce their risk of injury while still lifting heavy, this is a godsend.


    BENEFITS OF TRAP BAR TRAINING
    Training with the trap bar instead of the barbell has a few significant advantages in addition to making it simpler to exercise your traps vigorously and heavily.

    Compared to a mixed grip on a barbell, the neutral grasp of the trap bar lowers the likelihood of biceps rips. You can go hard like that without worrying about being hurt. Additionally, compared to a pronated or supinated grip, the neutral grip is easier on the forearms and elbows, aiding in the development of incredible grip strength. Our strongest grasp is the neutral grip.

    Because the axis of rotation is roughly parallel to the weight on either side, there is less shearing force on the spine. If your lower back is bothering you, this is fantastic since it lessens the amount of shearing stress on the spine.

    Compared to the barbell, the trap bar makes it simpler to learn difficult exercises like the deadlift and squat. It's quite forgiving when performing trap bar squats and deadlifts as long as you maintain a neutral spine.

    6 TRAP BAR EXERCISES
    Although trap bar deadlift and shrug variations are excellent, those aren't the only workouts you should do with one. Here are six trap bar workouts for diversity and improvement in your regimen.

    1. Trap Bar Floor Press
    If you have shoulder problems, the majority of floor press workout variations prevent the shoulder joint from excessive external rotation. If you have any issues with your wrists, elbows, or shoulders, the neutral grip trap bar floor press is easier on your upper body joints. The loading potential of the trap bar floor press over dumbbells for more strength and muscle is another benefit.

    Anterior shoulder, chest, and triceps muscles are worked out.

    Benefits: If you suffer from bench press shoulder pain, the trap bar floor press variation enables you to train the pressing motion in a heavy and painful-free range of motion.

    How to perform it: Position the trap bar on the squat rack such that you can reach underneath it and that the D handles are down. With your feet flat on the floor, your back straight, and your wrists in neutral, grab it and unrack. Until lockout, slowly lower until the triceps are in contact with the floor, then press back up. Restart and continue.

    It is recommended to use this workout to develop muscle and improve lockout strength. Here, three to five sets of six to twelve repetitions are ideal.


    2. Bent Over Row on Trap Bar
    With a neutral grip and a center of gravity that is closer to the weight than the barbell version, the trap bar bent over row is less taxing on your joints. Additionally, the setup is a little simpler. The wider neutral grip will put more strain on your upper back muscles while relieving some of the pressure from your lower back. Your posterior gains are positively impacted by this.

    Forearms, biceps, the posterior shoulder, the upper and lower back, and the lats were worked out.

    Benefits: Due to the grip strength requirements and the length of time spent in the hinge position, this exercise is a fantastic complement to deadlifts and chin-ups.

    How to perform it: Step within the trap bar, hinge down, and grab the D handles to complete the move. Pull your shoulder blades together, lift your chest, and row such that the back of the bar hits your glutes. Throughout the workout, make sure your elbows are angled at a 45-degree angle. Slowly lower yourself until your elbows are outstretched, then slowly rise back up.

    The following workout is excellent for boosting power and developing posterior muscle. A decent place to start is with three to five sets of six repetitions for strength and two to four sets of 12 to 15 repetitions for muscle.

    Page 1

  • #2
    3. Elevated Split Squat with a Trap Bar
    You are all aware of the benefits of split squats, despite their difficulty. Trap bar split squats are the exercise for you if you want your split squats to hurt even more. Because the back of the trap bar will bump up against your thigh if you lock your knees out in the trap bar version, you must maintain continual tension on your legs. This intensifies your fondness for the split squat and creates constant muscular strain for greater development.

    Forearms, quadriceps, glutes, and upper back muscles are worked out.

    Benefits: This version supports improved posture. The elevated split squat is overly complicated because too many lifters maintain an erect torso. However, with this variation, if you don't bend forward, your rear thigh will butt into the trap bar far too early.

    How to perform it: Put your second foot inside the trap bar with the D handles up and place your back foot flat on a bench to perform this exercise. Grab the D handles as you squat down with a forward incline and raise your hips till the back bar touches your thigh. Then progressively lower yourself until the weight plates are just over the floor, at which point halt and squat. For each rep, repeat.

    Use this exercise as an auxiliary exercise following squats or deadlifts to correct strength imbalances and increase leg drive. You can complete three to four sets of six to twelve repetitions.

    4. Elevated Squats with Trap Bar
    Although a limited range of motion (ROM) enables you to lift more weight, it is the primary drawback of trap bar squats. However, this drawback is solved by standing on a small, elevated area and using the low bar handles. This enables greater knee flexion, which emphasizes your quadriceps more like a squat should. Although grip strength is a concern, if you are unable to perform belt or hack squats, this is a good alternative.

    Quads, glutes, forearms, and upper back muscles are worked out.

    Benefits: This variation's narrower stance works the quads hard while simultaneously strengthening the grip and legs.

    How to perform it: Step within the trap bar after inserting the little, elevated surface inside of it. Squat down and grasp the low grips while keeping your shoulders down and your chest up. By driving your feet into the floor and finishing with your glutes, you can squat while maintaining a neutral spine. Reset and repeat after lowering yourself to the ground.

    Best utilized as an accessory exercise to increase grip and quad strength. Programming suggestion. Other weightlifters will be envious of your quads after three to four sets of six to fifteen repetitions.

    5. Tall-Kneeling Shoulder Press with a Trap Bar
    Although barbell overhead presses are excellent, not all lifters have the mobility and stability required to perform them. The tall-kneeling shoulder press is useful in this situation. Since hard overhead lifts can result in wrist hyperextension, the neutral grip is less taxing on your wrists and elbows. The tall-kneeling stance activates the hips and core while providing immediate feedback on your pressing mechanics.

    Hips, hamstrings, lower back, deltoids, and triceps were all worked out.

    Benefits: Because you will be forced out of position by the tall-kneeling position, you will immediately know if anything is wrong with your overhead pressing form.

    How to perform it: The trap bar should be positioned in the squat rack with adequate room to pass below it. It should be just shoulder height. Grab the high or low bar handles firmly while standing up straight and keeping your wrists neutral. Once your elbows are locked out, slowly lower yourself back to the pins by pressing up. Restart and continue.

    Though you can train this for strength, it is ideal for increasing muscular mass and perfecting your overhead pressing technique. It's best to do three to four sets of six to twelve repetitions.

    6. Suitcase Carry
    Because you walk with a load in one hand, carrying a luggage is a terrific way to develop your grip and core. As the weight is further off-center with the trap bar suitcase carry, your obliques will have to work harder. Additionally, you can increase your strength gains by loading a lot more weight onto a trap bar than any other dumbbell variation.

    Forearms, deltoids, obliques, and glutes were all worked out.

    Benefits: For increased grip strength, you can load this variation heavier than any dumbbell variation.

    How to perform it: First, load the plates on both ends of the trap bar while it is standing on its side to make it easy. Lift the trap bar off the ground by grabbing the middle of the bar. Walk slowly, keeping your shoulders down, your chest high, and your shoulders level. Put the trap bar on the ground and rest it on the side of your leg once you have traveled the prescribed distance. Then, when you turn around, grab on with one hand. then switch sides.

    Train when you are fresh, close to the beginning of your training. It will work with one to two sets of 40 yards on either side.


    Page 2

    Comment

    Working...
    X